socks 代理工具 c++ 💦
推荐与参考文章、项目
linux网络编程系列(二)-socket套接字基本概念详解 – 知乎 (zhihu.com)
RFC 1928 – SOCKS 5 协议中文文档「译」 – 光韵流转 (quarkay.com)
用c语言写一个socks5代理服务器 | 木枣粽子 | BLOG (muzaozong.com)
mzz-bridge-c 源代码分析
Client
- StartClient
开始监听本地端口,并创建socket文件 clientSock
- Clientloop
accept 接受本地请求并产生socket文件 usersock,用于链接本地请求
- handleUserRequest(config,userSock)
产生serversock(链接远程服务器端),并connect服务端socket
- forwardData(int srcSock, int dstSock, int encryption) 传递数据
- forwardDate(usersock,serversock,1)
-
retryRecv(usersock)
- retrySend(serversock)
将本地接受到的数据转发给服务器端
- forwardDate(serversock,usersock,0)
-
retryRecv(serversock)
- retrySend(usersock)
接受服务器端数据,并发给本地usersock
这么来看,Client只是做了代理转发,虽然socks中已经包含代理转发,但我们可以自定义Client,比如流量加密。
Server
- startServer
create listeningSocket
- serverloop
clientSock = accept,链接远程客户端
- validateSock5connect
这里需要注意的是协议版本与认证方法数据包格式中的
1 to 255指的是从1字节到255字节,原作者这边的长度设置错误+----+----------+----------+ |VER | NMETHODS | METHODS | +----+----------+----------+ | 1 | 1 | 1 to 255 | +----+----------+----------+
对应socks5中的协议版本与认证方法数据包格式,进行确认。
若Ver = 5,Method = 0,返回method=0的response
- createSock5Connection
以request信息创建remoteSock,链接内网
注意的是,原项目使用IPv4时,可能会有BUG,可以修改
server.cpp中的createsocksconnnect方法
if (request.atyp == 0x01) { // IPV4 X‘01’
in_addr_t ip;
memcpy(&ip, request.dstAddr, 4);
char str[32];
// printf("IPv4 Address: %s\n",inet_ntop(AF_INET,&ip,str, sizeof(str)));
remoteAddr.sin_addr.s_addr = ip; // 很奇怪,这里不需要转换成网络字节顺序,需要修改处
} else if (request.atyp == 0x03) { // 域名 X‘03’
struct hostent *dstHost = gethostbyname(Byte_arrayToStr(request.dstAddr, request.addrLength));// 域名 -> IP v4
char str[32];
// printf("IPv4 Address: %s\n",inet_ntop(dstHost->h_addrtype,dstHost->h_addr_list[0],str, sizeof(str)));
remoteAddr.sin_addr.s_addr = *(in_addr_t *)dstHost->h_addr;
} else {
return -1;
}
- forwardData(ClientSock,remoteSock,0)
先获取ClientSock,再发送给remoteSock
- forwardData(remoteSock,clientSock,0)
先获取remoteSock,再发送ClientSock.
可以看出,对socks5协议的认证和处理,在成功之后就代理转发socks5数据
设计要求
socks 代理工具具有以下功能:
- 实现 socks 代理,基于原作者项目
- 用户登录,基于rfc 1929
- socks 流量加密,利用Client端和Server链接
程序设计
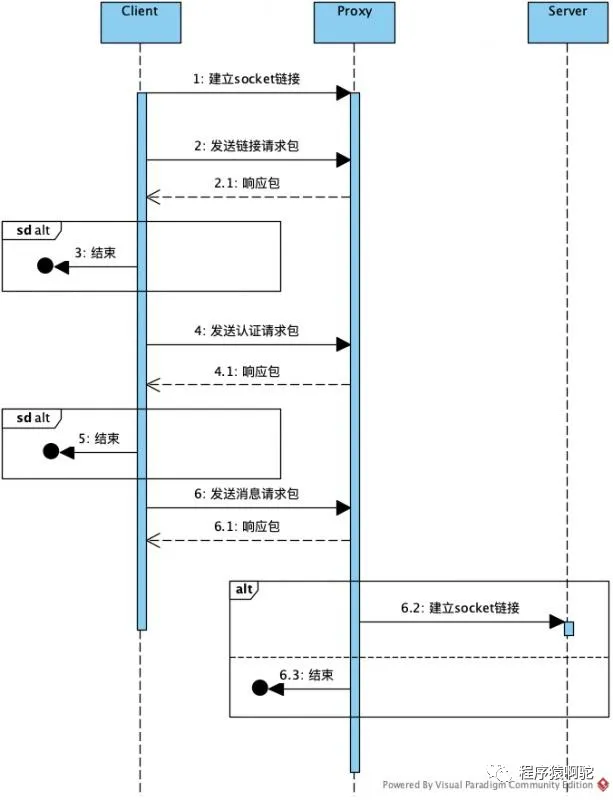
Socks 流程 [转载]
Sokcs流程如下图 : 来源 Socks协议 (qq.com)
用户登录
参考:
main
int main(int argc, char *argv[]) {
struct Config config;
int opt;
if (argc == 1){
printf("Usage:\nClient: -P [local port] -c -h [remote ip] -p [remote port]\nServer: -P [local port] -s -u [username] -w [password]\n");
}
opterr = 0;
while ((opt = getopt(argc, argv, "P:csh:u:w:p:")) != EOF) {
switch (opt) {
case 'P': config.localPort = atoi(optarg); break;
case 'c': config.client = 1; break;
case 's': config.server = 1; break;
case 'h': config.serverHost = optarg; break;
case 'p': config.serverPort = atoi(optarg); break;
case 'u': config.username = optarg; break;
case 'w': config.password = optarg; break;
}
}
signal(SIGCHLD, SIG_IGN);// 对 SIGCHLD 进程信号,忽视处理
// config.server =1 ;
// config.username = "test";
// config.password = "test";
// config.localPort = 8848;
if (config.client) {
startClient(config);
} else if (config.server) {
printf("Username: %s\nPassword: %s\n",config.username,config.password);
startServer(config);
}
printf("Finish\n");
return 0;
}
Config
添加key value
struct Config {
int localPort; // -p [port], 本地监听端口
int client =0; // 客户端模式
int server =0; // 服务端模式
char* serverHost; // 客户端模式下,需要指定服务端地址
int serverPort; // 客户端模式下,需要指定服务端端口
char* username; //服务器模式下,socks5验证可以指定用户名
char* password; //服务器模式下,socks5验证可以指定密码
};
server
修改validateSock5Connection函数,添加AuthSock5Connection函数用于身份验证
int AuthSock5Connection(struct Config config,int clientSock){
printf("Auth sock5 connection.\n");
char buffer[SOCK5_AUTHENTICATION_REQUEST_MAX_LENGTH];// 协议版本与认证方法数据包的长度为513
if (retryRecv(clientSock, buffer, SOCK5_AUTHENTICATION_REQUEST_MAX_LENGTH) < 0) {
return -1;
}
int ok = 0;
struct Sock5AuthRequest request = Sock5AuthRequest_read((Byte *)buffer); //读取 socks package

if( strcmp((char *) request.username ,config.username) == 0 && strcmp((char *) request.password ,config.password) == 0 && request.version == 0x01 ){
ok = 1;
}
else{
if( strcmp((char *) request.username ,config.username) != 0 ){
printf("Error: username\n");
printf("Request: %s\n",(char *) request.username);
printf("config: %s\n",config.username);
}
if( strcmp((char *) request.password ,config.password) != 0 ){
printf("Error: password\n");
printf("Request: %s\n",(char *) request.password);
printf("config: %s\n",config.password);
}
if( request.version != 0x01){
printf("Error: Version\n");
}
}
struct Sock5AuthResponse response;
response.version = 0x01;
response.Status = ok ? (Byte)0x00 : (Byte)0xFF;
return (int)retrySend(clientSock, Sock5AuthResponse_toString(response), 2);
}

int validateSock5Connection(struct Config config,int clientSock) {
// 验证 客户端发送的 DateSource,具体数据格式见 https://www.quarkay.com/code/383/socks5-protocol-rfc-chinese-traslation
printf("validate sock5 connection.\n");
char buffer[SOCK5_VALIDATE_REQUEST_MAX_LENGTH];// 协议版本与认证方法数据包的长度为3
if (retryRecv(clientSock, buffer, SOCK5_VALIDATE_REQUEST_MAX_LENGTH) < 0) {
return -1;
}

struct Sock5ValidateRequest request = Sock5ValidateRequest_read((Byte *)buffer); //读取 socks package

int ok = 1;

ok &= request.version == 0x05; // 验证客户端协议版本是否正确

// 验证客户端是否支持无验证方式的请求
int allowNoAuth = 0;
int allowAuth =0;
for (int i = 0; i < request.methodNum; i++) {
if (request.methods[i] == 0x02 ){
allowAuth = 1 ;
printf("Method: USERNAME/PASSWORD\n");
}
if (request.methods[i] == 0x00) {
allowNoAuth = 1;
printf("Method: NoAuth\n");
}
//是否是 USERNAME/PASSWORD
}
struct Sock5ValidateResponse response;
response.version = 0x05;
if(ok && allowAuth){
response.method = (Byte)0x02 ;
retrySend(clientSock, Sock5ValidateResponse_toString(response), 2);
return (int)AuthSock5Connection(config,clientSock);
}else{
response.method = (ok && allowNoAuth) ? (Byte)0x00 : (Byte)0xFF;
return (int)retrySend(clientSock, Sock5ValidateResponse_toString(response), 2);
}
}
socks5
#socks5.h
struct Sock5AuthRequest{
Byte version;
Byte usernameLen;
Byte *username;
Byte passwordLen;
Byte *password;
};

struct Sock5AuthResponse{
Byte version;
Byte Status;
};

#socks5.cpp
struct Sock5AuthRequest Sock5AuthRequest_read(Byte *buffer){
struct Sock5AuthRequest request;
request.version = buffer[0];
request.usernameLen = buffer[1];
request.username = (Byte *)malloc(request.usernameLen); // 分配所需的内存空间,并返回一个指向它的指针
Byte_copyN(request.username, buffer + 2, request.usernameLen);// 前面不是限定了buffer长度为3,后面就只有一个
request.passwordLen = buffer[2+request.usernameLen];
request.password = (Byte *)malloc(request.passwordLen);
Byte_copyN(request.password, buffer + 3 + request.usernameLen, request.passwordLen);
return request;
}
/**
* 将sock5身份验证响应转换为字符串
* @param response
* @return
*/
char* Sock5AuthResponse_toString(struct Sock5AuthResponse response){
Byte *result = (Byte *)malloc(3);// 三个字节,用来两
int p = 0;
result[p++] = response.version;
result[p] = response.Status;
return (char *)result;
}
实现效果
设置/etc/proxychains4.conf
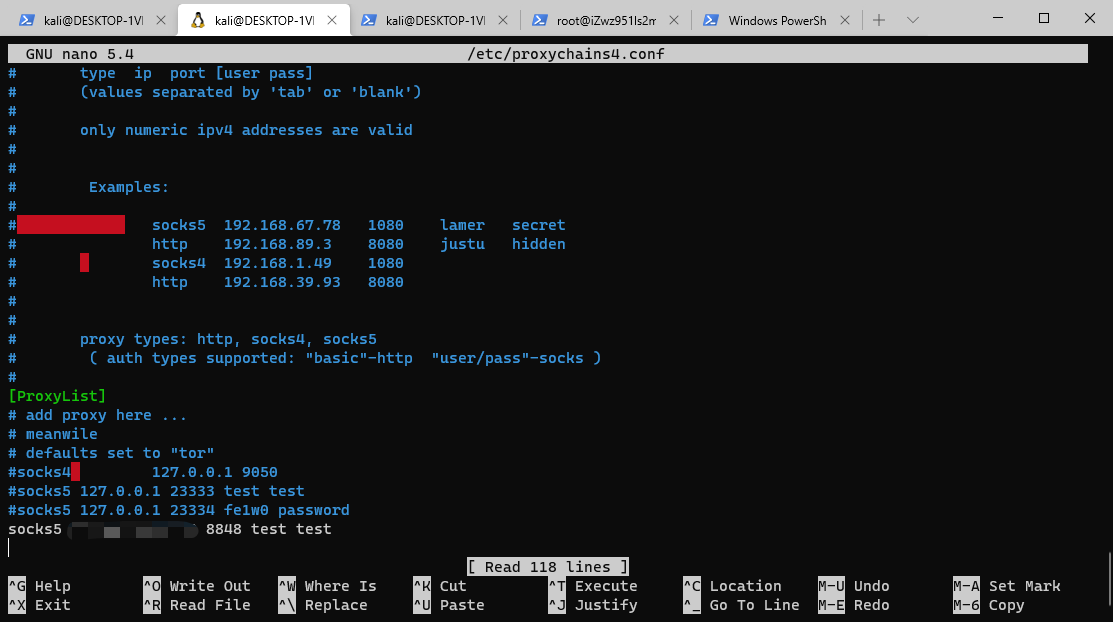
启动服务

启动代理

socks 流量加密
大致思路,在客户端和服务端间添加流量加密。
- 修改
common.cpp,添加流量加密功能
#include "aes/aes.hpp"

void main(){
void encryptData(uint8_t * buffer,ssize_t n){
struct AES_ctx ctx;
// printf("original raw:\n");
// for (int i = 0; i < n; ++i) {
// printf("%.2x", buffer[i]);
// }
// printf("\n");
uint8_t key[] = "lxr@xzas@#$%WERT";
uint8_t iv[] = "xzas@lxr@WSX3edc";
AES_init_ctx_iv(&ctx,key,iv);
AES_CTR_xcrypt_buffer(&ctx,buffer,n);
// printf("Changed raw:\n");
// for (int i = 0; i < n; ++i) {
// printf("%.2x", buffer[i]);
// }
// printf("\n");
}

void forwardData(int srcSock, int dstSock, int encryption) {
char buffer[8192];
ssize_t n;//ssize_t 这个数据类型用来表示可以被执行读写操作的数据块的大小
while ((n = retryRecv(srcSock, buffer, 8000)) > 0) {
if(encryption == 1){ // encryption = 1,执行加密或解密
encryptData((uint8_t *)buffer,n);
}
if (retrySend(dstSock, buffer, (size_t)n) < 0) {
break;
}
}
shutdown(srcSock, SHUT_RDWR); // 断开tcp 链接
shutdown(dstSock, SHUT_RDWR);
}

}
其中#include "aes/aes.hpp"是基于 tiny-AES-c
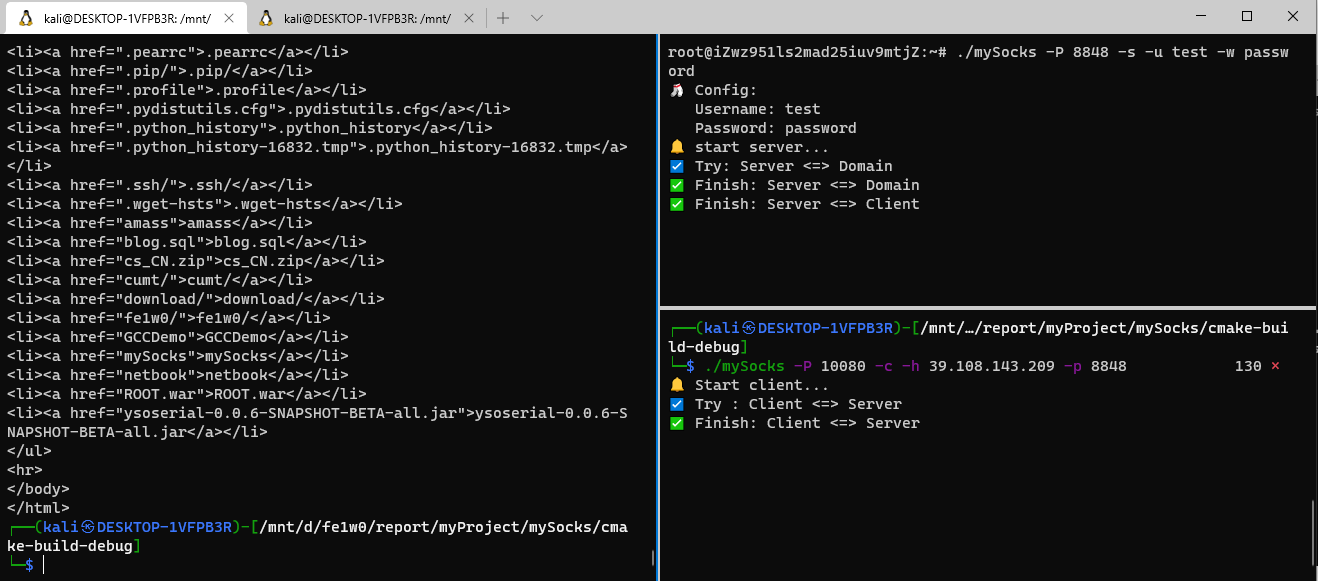
- 加密后流量

仔细观察,可以发现流量在认证部分,还是比较明显的,但完全可以添加垃圾数据,大致思路就是在后面放无用的数据。为什么无用,因为在检验认证过程中,采取的方法是读取固定长度的buffer,不太可能去误读取垃圾数据段。
还存在的问题
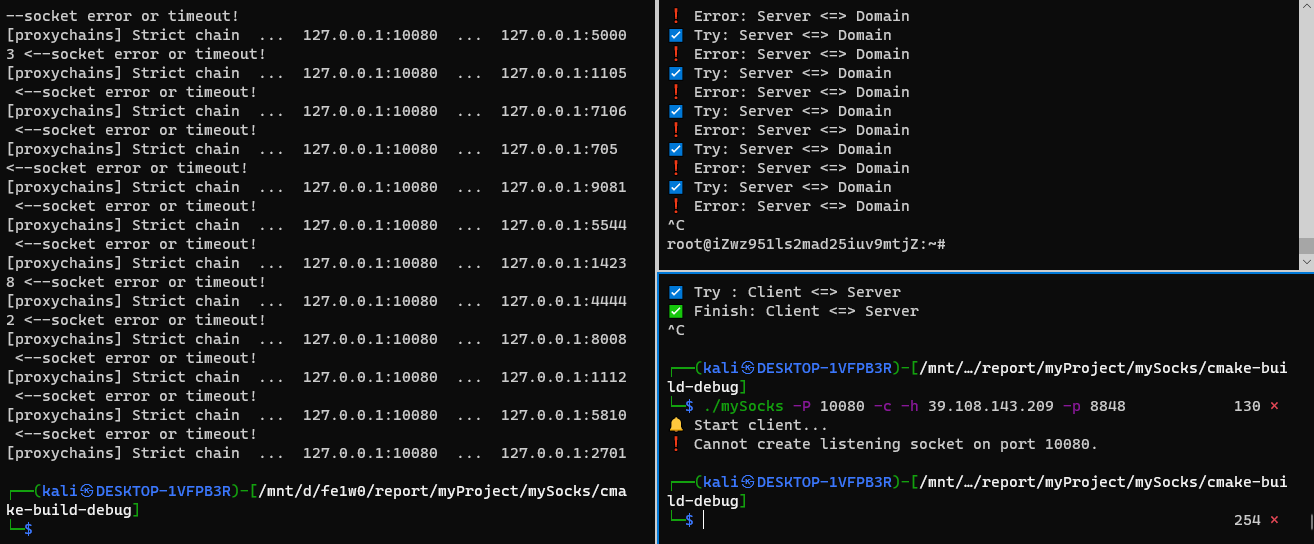
当Client端强制关闭时,socket 暂时无法使用。还有一个安全上的问题,流量还未混淆,以及可以被重放攻击。
总结
感谢用c语言写一个socks5代理服务器 | 木枣粽子 | BLOG (muzaozong.com)前辈的分享和iyzyi的帮助。
通过这个项目,个人算是比较详细的学习了SOCKS5协议与其编写,以及明白C++变量的复杂(不同环境下,字节还可能不一样,要使用规范的模式)。
应对重放攻击,本来想在socks协议上添加上一个挑战与响应的机制,但不太好实现,要重新写一个类似proxychains的工具了。

